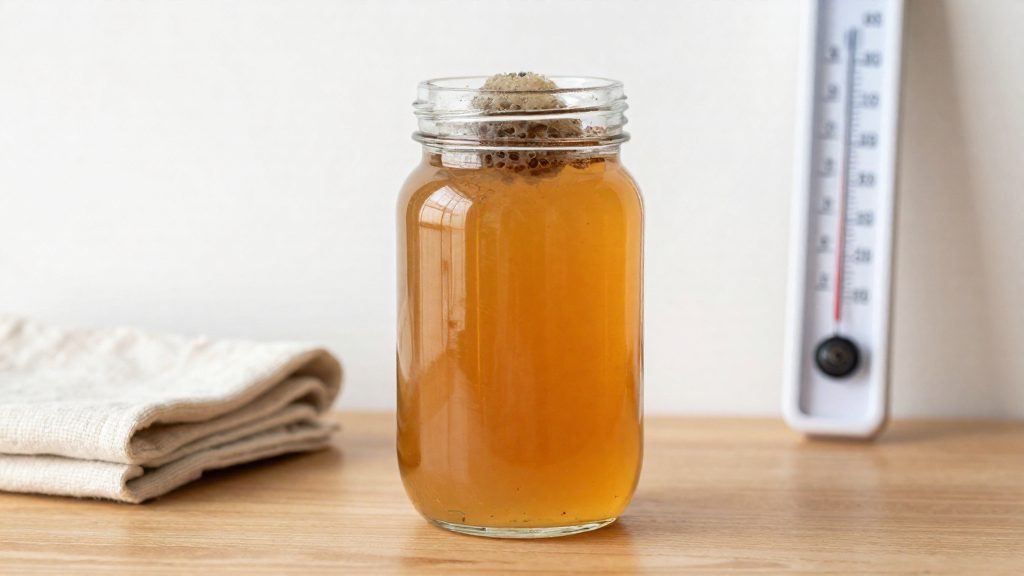
Winter kombucha usually takes longer than a summer batch. At an ideal fermentation temperature, Craftabrew (2025) gives a typical fermentation time of 7–14 days, with the exact stop point depending on taste preference.
How long does kombucha take to ferment in winter?
The 7–14 day baseline
Craftabrew (2025) puts a typical kombucha fermentation at 7–14 days when the brew is kept at the ideal temperature. The range reflects taste preference, so it describes a reference window rather than a single finish point. Use it as the starting point for planning, then adjust for your room.
Planning extra days for winter batches
Kombucha Kamp (2019) notes that winter batches usually take longer and recommends planning a few extra days. The source does not quantify “a few,” so build a buffer into your schedule instead of assuming a fixed number. A practical approach is to start from the low end of the baseline and allow additional time before you plan the next batch or bottling step.
The main variable is room temperature. The stated timings differ across conditions:
| Condition | Stated timing | Source |
|---|---|---|
| Ideal fermentation temperature | Typical 7–14 days | Craftabrew (2025) |
| Winter or colder months | Usually longer; plan a few extra days | Kombucha Kamp (2019) |
Reading day ranges as estimates, not deadlines
A day range describes typical behaviour, not a schedule that the brew must follow. A winter batch still fermenting after day 14 has not necessarily failed. Treat the 7–14 day figure as estimates, not deadlines.
Why cold slows kombucha fermentation
Kombucha is a mixed culture of yeast and bacteria. Yeast ferments sugars into ethanol and carbon dioxide, and acetic acid bacteria then oxidise the ethanol into acetic acid. Acetic acid bacteria then oxidise the ethanol into acetic acid. Each step depends on enzymes, and enzyme activity falls as the liquid cools. When the brew drops below the range the culture prefers, the yeast and bacteria work more slowly, and every stage runs behind schedule.
Residual sugar is the most visible result. Slower yeast activity means less sucrose is broken down and fewer sugars are converted to ethanol. More sugar stays in the finished tea, so a cold batch can taste sweeter than a warm one left for the same number of days. Lower yeast activity also produces less carbon dioxide, so a cold batch carbonates less.
Acetic acid bacteria rely on the ethanol that yeast produces. When yeast is slow, the bacteria have less substrate, and the acid level rises more gradually. The rate of acid build-up therefore follows the rate of yeast activity.
| Factor | Warm brew (75–85°F / 24–29°C) | Cold brew (below about 70°F / 21°C) |
|---|---|---|
| Typical duration | 7–14 days (Craftabrew, 2025) | Longer; no day count is given for cold batches |
| Sugar consumption | Steady, so residual sugar falls | Slowed, so more residual sugar remains |
| Carbon dioxide output | Normal | Lower, so less carbonation |
Why the same starter behaves differently between seasons
The starter culture itself does not change between seasons. What changes is the temperature it works in. A starter that finishes in 7–14 days in a warm kitchen in summer may need several more days in a cold room in January.
Because the culture works more slowly in the cold, Kombucha Kamp (2019) recommends a larger share of starter tea in colder months.
What temperature does kombucha need?
Kombucha ferments best between 75–85°F (24–29°C), according to Craftabrew (2025-10-28).
Within the window, 78°F (26°C) is the target that Fermentaholics (2018-04-19) describes as the sweet spot. Below this point, yeast activity slows and fermentation takes longer, so the same brew needs more days to reach the same level of acidity.
| Temperature | What the sources report |
|---|---|
| 75–85°F (24–29°C) | Ideal fermentation range (Craftabrew, 2025-10-28) |
| 78°F (26°C) | Sweet spot; below it, yeast slows (Fermentaholics, 2018-04-19) |
| About 70°F (21°C) | Fermentation slows or stalls (Craftabrew, 2025-10-28) |
| 68°F (20°C) | Labelled “too cold” in the Craftabrew summary |
Where batches stall
Craftabrew places the stall point at about 70°F (21°C). The sources give no figures for the range between 70°F and 75°F, but a brew held in that band can be expected to run slower than one in the ideal window. A batch in a cool room may look unchanged for several days. Temperature is a likely cause, but it is not the only one, so check the other factors before concluding the cause.
Work through these checks when a batch stops moving:
- Vessel temperature: the room thermometer may read higher or lower than the liquid. Take the reading at the vessel itself.
- Starter volume: confirm the batch received enough starter tea for its size. A small share gives the culture less acid to start from, which slows the early stage.
- Starter condition: a weak starter is also possible. Inspect the starter for an off smell or visible mold before using it.
- pH: a reading above 4.0 means the batch has not yet reached the protective acidity level, whatever the calendar says.
To check your setup, read the temperature at the brew vessel itself, not only the room thermometer. Compare that reading against the 75–85°F window and the 70°F stall point. If the reading stays below 70°F, warm the batch and recheck its pH over the following days rather than only waiting.
How can you keep kombucha warm in winter?
Cold rooms slow kombucha fermentation, so the aim is a setup that holds one stable temperature around the vessel rather than a short burst of heat. Three approaches are common in home brewing: a heat mat with thermostat, an insulated enclosure such as a cupboard or cooler, and careful side placement of any heat source. Each controls temperature differently, and they work best in combination.
Heat mat with thermostat
According to Fermentaholics (2018), a heat mat is the best way to keep the temperature steady. The thermostat is what makes it effective: it switches the mat on and off to hold a set point instead of letting the temperature follow the room. Place the vessel on or beside the mat as its instructions direct.
Insulated cupboard or cooler
An insulated cupboard or cooler slows heat loss, so the air around the jar changes less between day and night. Neither produces heat on its own. Add a small heat source inside or next to the enclosure, and keep the lid or door closed so warmed air stays in. Because the enclosure holds heat, a thermometer placed inside shows whether the setup is drifting high as well as low, which a thermostat-free setup cannot reveal.
Side placement versus bottom heating
Kombucha Kamp (2019) advises heating the brew from the sides rather than from underneath. Side placement keeps the heat source away from the base of the vessel, where direct warmth concentrates. Position the heat source against the outside wall of the enclosure or beside the vessel, not beneath it, and let the warmth reach the liquid from the sides.
Which heat sources should you avoid?
Not every warm spot in a home suits a fermenting brew. Kombucha Kamp (2019) names two common improvised heat sources as not recommended: Christmas lights and an oven with its light switched on. The source gives no specific hazard for the lights, so the advice rests on the recommendation alone. Christmas lights are sometimes chosen because they give off gentle, low warmth, but that is not enough reason to rely on them for a batch that needs several days of steady conditions.
The oven raises more concrete concerns, and the same source identifies two separate risks.
| Risk | Cause | Why it matters for the batch |
|---|---|---|
| Oven corrosion | The acidic brew | Kombucha is acidic, and the source cites corrosion from the acidic brew as a risk of using the oven. |
| Accidental switch-on | The oven being turned on while the batch is inside | The brew can be exposed to heat it was not set up for, and the risk is higher in a kitchen where the oven is used for cooking. |
Because the oven is used for cooking, the risk of an accidental switch-on is the more practical concern. A brew placed in an oven can be forgotten when someone preheats for a meal. If an oven is the only warm place available, the source’s advice is to avoid it and find a different heat source instead.
How much starter tea should you use in cold weather?
In cold months, add more starter tea than you would in a warm kitchen. Kombucha Kamp (2019) recommends 2–4 cups of starter liquid per gallon in colder months. The baseline is at least 1 cup per gallon, and 2 cups if you can manage it. Fermentaholics (2018-04-19) gives a percentage instead: at 70–72°F, use about 20% starter tea relative to the batch.
The two figures overlap. A US gallon holds 16 cups, so the cup-based figures convert to these shares of the batch:
| Starter tea per gallon | Share of batch (calculated) | Guidance |
|---|---|---|
| 1 cup | about 6% | Minimum standard (Kombucha Kamp, 2019) |
| 2 cups | about 12.5% | Recommended in winter if possible (Kombucha Kamp, 2019) |
| 3.2 cups | 20% | Fermentaholics (2018-04-19) figure for 70–72°F |
| 4 cups | 25% | Upper end of winter range (Kombucha Kamp, 2019) |
Why a larger share helps
Kombucha Kamp (2019) notes that cold slows the pH drop, which gives mold and Kahm yeast a longer window. A larger share of starter tea is recommended in cold months to help counter this.
Practical steps
- Measure the starter tea by volume, not by estimate, before adding sweet tea.
- Start at 2 cups per gallon in winter. Move to 3–4 cups if the room is consistently cool.
- Keep the starter tea from a healthy, recently brewed batch that already smells clean and sour.
- Check pH with test strips once the batch is well along. Do not rely on taste alone to judge safety.
How do you know winter kombucha is ready?
Winter kombucha is ready when its taste reaches the balance you want, not when a set number of days has passed, so the calendar is a weak guide in a cold room. Three checks give a more reliable reading: a taste test, a visual check and a sample taken from the liquid.
Taste test
Track sweetness first. As the culture consumes sugar, the brew becomes less sweet. A batch that still tastes strongly sugary is usually early in fermentation. Tartness moves the other way and rises as acids accumulate. Take a small sample on a clean spoon or straw at each check, and compare it with the previous one so that the change is easier to notice. Because cold slows the process, a gradual shift from sweet toward sharp over several checks is more informative than one isolated taste.
Visual cues
The pellicle, the rubbery layer that forms on the surface, does not show readiness on its own. Its thickness varies with the batch and does not reveal how sweet or sour the liquid is, so treat it as one observation among several. Carbonation is easier to judge. Look for small bubbles rising through the liquid when the vessel is gently swirled, and for fizz when a sealed bottle is opened. A flat batch with no visible bubbles at all suggests it needs more time, or that the bottle has not been sealed for a second fermentation.
Sample from the liquid, not the pellicle
Draw samples from below the surface with a clean, sanitised straw or ladle. The pellicle is a cellulose mat produced by the culture, so pulling samples from it gives a misleading picture of the liquid. Taste shows flavor only. Use pH strips to confirm the brew is below pH 4.0. Keep the vessel covered between checks and wash your hands before handling it.
Is slow winter fermentation safe?
Slow winter fermentation carries more contamination risk. A pH below 4.0 is the main protection against contamination, and cold slows the pH drop, so a cold batch takes longer to reach it (Kombucha Kamp, 2019). Keep checking the batch for mold even after it reaches that pH. Cold does not change that threshold. It changes how long the batch takes to get there. According to Kombucha Kamp (2019), cold slows the pH drop, which gives mold and Kahm yeast a longer window to establish themselves. According to the source, cold slows the pH drop, which gives mold and Kahm yeast a longer window.
Why a cold batch carries more risk
A batch held below about 70°F (21°C) acidifies more slowly, so the period in which mold or Kahm yeast can take hold is longer. Because the same starting conditions take more time to reach a safe pH, a winter batch remains in the vulnerable stage for longer than a warm one.
Telling mold from Kahm yeast
- Kahm yeast typically forms a flat, wrinkled white film on the surface.
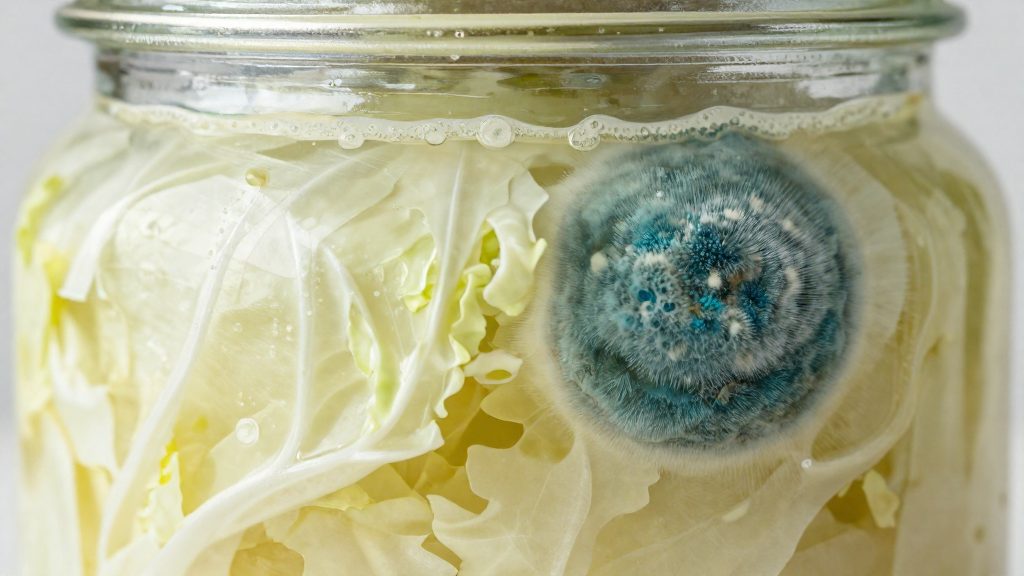
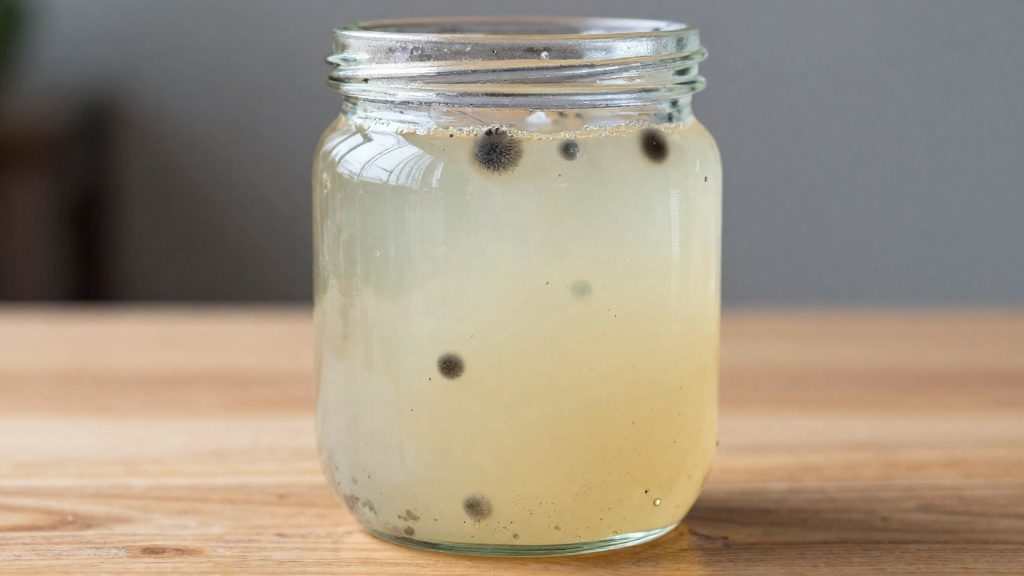
- Mold typically appears as fuzzy spots in white, green, blue, or black.
Kahm yeast and mold can be hard to tell apart, so if you are unsure, treat the growth as mold and discard the batch. Mold is a reason to stop, not to adjust.
What to do when mold appears
Discard the entire batch, including the pellicle and the liquid, if you see visible mold. Skimming the surface does not reliably remove mold, so do not salvage the batch. Clean the vessel before starting a new brew, and keep the next batch at the target temperature range so it reaches a pH below 4.0 as quickly as possible.
Frequently asked questions
My winter kombucha is still fermenting after 14 days. Is it ruined?
Not necessarily. Craftabrew (2025) gives 7–14 days for the ideal 75–85°F range. Check the pH with test strips, which should read below 4.0, and inspect the surface for mold before deciding what to do next.
How do I keep the brew warm in winter without using an oven?
Heat the vessel from the sides rather than from underneath. Kombucha Kamp (2019) advises against using the oven, citing corrosion from the acidic brew and the risk of the appliance being switched on by accident. Fermentaholics (2018) describes a heat mat as the best way to hold a steady temperature and puts the sweet spot at about 78°F.
Do I need more starter tea when fermenting in cold months?
Kombucha Kamp (2019) recommends 2–4 cups of starter liquid per gallon in colder months, compared with a minimum of 1 cup and 2 cups where possible. Fermentaholics (2018) suggests about 20% starter tea at 70–72°F, which works out to roughly 3.2 cups per gallon and falls within that 2–4 cup range.